The Ultimate Guide: How to Convert Image to 16:9 Aspect Ratio for YouTube in 2026
You've crafted the perfect thumbnail image—stunning visuals, bold text, and just the right amount of branding. But when you upload it to YouTube, you face a frustrating reality: the image is cropped awkwardly, key elements disappear, or YouTube slaps those dreaded black bars on the sides. The culprit? An incorrect aspect ratio.
Whether you're a content creator racing to hit publish, a designer preparing client assets, or an e-commerce seller repurposing product photos for video marketing, getting your images to fit the 16:9 aspect ratio is non-negotiable in 2026. YouTube's player is built for widescreen, and if your visuals don't match, your professionalism takes a hit.
The good news? You don't need a degree in graphic design or expensive software to fix this. In this guide, I'll walk you through exactly how to convert image to 16:9 aspect ratio for YouTube, share the tools I've personally tested, and ensure your images stay sharp, load quickly, and look incredible on every screen.
If you're looking for the fastest solution, I've been using the Change Image Aspect Ratio to 16:9 tool from ResizeOn. It’s a free, browser-based tool that handles the cropping and resizing automatically. Let’s dive into the complete process.
Quick Answer: How to Convert Image to 16:9 for YouTube
Converting an image to a 16:9 aspect ratio means adjusting its width and height to a standard widescreen proportion (like 1920x1080 pixels or 1280x720 pixels). To do this quickly: use an online tool like Change Image Aspect Ratio to 16:9, upload your photo, let the tool crop it to the correct dimensions, and download your YouTube-ready image in seconds.

What is "How to Convert Image to 16:9 Aspect Ratio for YouTube"?
If you're new to content creation, the term "aspect ratio" might sound technical. Simply put, it's the relationship between your image's width and its height. The 16:9 aspect ratio means that for every 16 units of width, there are 9 units of height. It's the standard for high-definition television and almost all online video platforms.
When we talk about how to convert image to 16:9 aspect ratio for YouTube, we're referring to the process of taking any image—whether it's a square photo from your phone, a vertical portrait, or a panoramic landscape—and reshaping it to fit these exact widescreen specifications. This usually involves either:
- Cropping: Cutting off parts of the image to fit the new shape.
- Adding Backgrounds: Filling the empty space with a blur or solid color (less ideal for thumbnails).
- Resizing with Smart Scaling: Using AI tools to intelligently fit the subject into the frame.
For YouTube specifically, this is crucial for thumbnails (which act as the billboard for your video), channel art, and video end screens.
Why Image Resizing Matters More Than You Think
In my years of optimizing content for the web, I've learned that image dimensions are about far more than just aesthetics. Here’s why getting this right is a critical part of your workflow:
- First Impressions & Brand Credibility: A stretched or poorly cropped thumbnail screams "amateur." Viewers subconsciously judge your video's quality by its thumbnail. In 2026, with AI-generated content everywhere, a professionally proportioned image signals that you care about quality.
- Page Load Speed & SEO: This is a big one. Uploading a massive 4000x3000 pixel image and letting YouTube (or your website) squish it down is inefficient. It increases file size and slows down load times. Google's algorithms prioritize fast-loading pages. By resizing your image to the exact 16:9 dimensions you need (like 1280x720), you reduce the file size without losing quality, which directly supports your SEO efforts.
- Platform Compliance: YouTube has specific display areas. If your thumbnail doesn't fit the 16:9 box, the platform will auto-crop it, potentially cutting out your face or your key text. You lose control of your message.
- Visual Consistency: If you run a channel, using a consistent 16:9 format for all your thumbnails creates a cohesive, professional look that helps with brand recognition.
The Best Tool: Change Image Aspect Ratio to 16:9
Over the years, I've tested dozens of image resizers—from command-line tools to complex desktop software. For speed and simplicity, one tool stands out for this specific task. I regularly recommend the Change Image Aspect Ratio to 16:9 tool on ResizeOn.
Here’s why I keep coming back to it:
- It's Free and Online: There's no software to download, no sign-up forms to fill out, and no hidden paywalls. You can use it on any device—Mac, Windows, Chromebook, or even your phone.
- Incredibly Simple: The interface is designed for humans. You don't need to manually calculate pixels. You upload, and the tool guides you.
- Batch Processing Potential: While you can do single images, the workflow is so fast that processing multiple thumbnails for a batch of videos takes just a few minutes.
- Quality Preservation: One mistake many users make is using basic image editors that drastically reduce quality during a resize. This tool intelligently handles the cropping and resizing to maintain sharpness.
Tool Highlight: Need a perfect 16:9 image? Our free tool quickly converts any photo to the ideal widescreen aspect ratio. Crop and resize for YouTube thumbnails, social media posts, and presentations in seconds. Get a professional, optimized image with just a few clicks.
Step-by-Step Guide: Convert Your Image in 5 Minutes
Let me walk you through the exact process I use when preparing images for my own YouTube channel. It's straightforward and takes less time than brewing a cup of coffee.
Step 1: Navigate to the Tool
Open your browser and go to the dedicated tool page: https://resizeon.com/image-tools/change-aspect-ratio-to-16-9
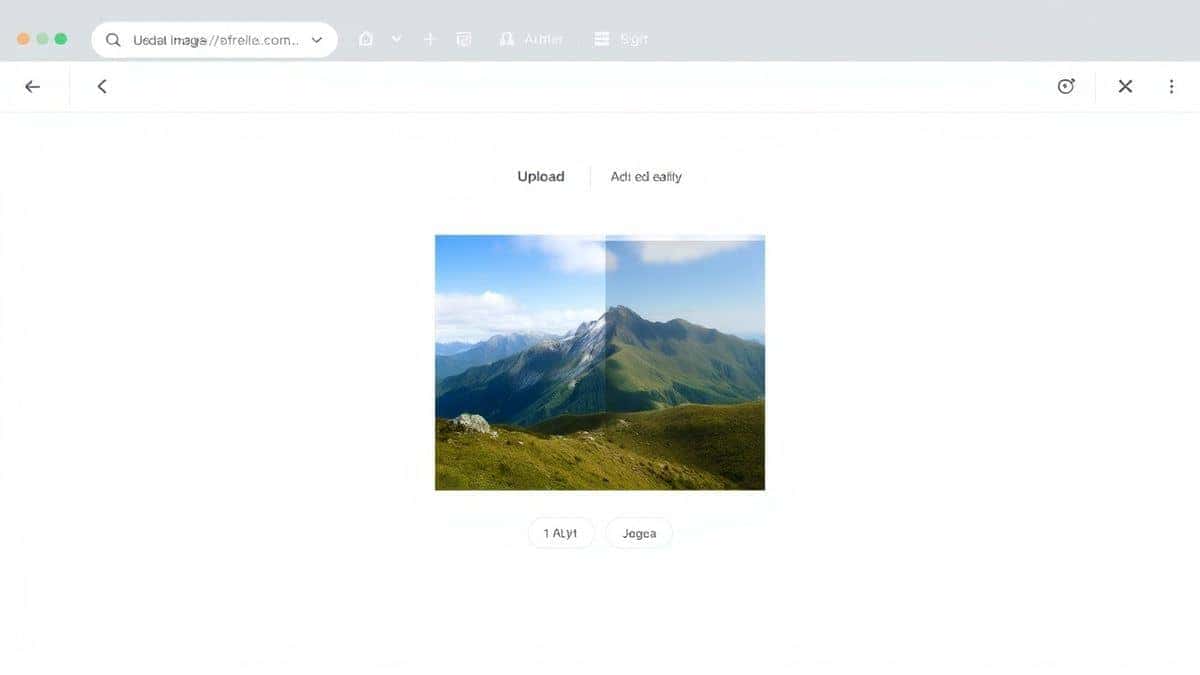
Step 2: Upload Your Source Image
Click the upload area and select the image you want to convert. This could be a photo from your recent shoot, a graphic you designed in Canva, or even a screenshot. The tool accepts all major formats like JPG and PNG.
Step 3: Select or Confirm Your 16:9 Dimensions
The tool will automatically set the crop to a 16:9 ratio. You can often choose from common presets like 1920x1080 (Full HD) or 1280x720 (HD) , which are perfect for YouTube. If your original image isn't exactly 16:9, you'll see a movable crop window. Drag this window to select the most important part of your image that you want to keep.
Step 4: Adjust and Preview
This is a critical step. Before finalizing, preview the image. Make sure no crucial text or faces are being cropped out. From testing different tools, I've found that having a live preview here is essential to avoid mistakes.
Step 5: Click to Resize and Download
Once you're happy with the framing, hit the resize button. The processing is almost instantaneous. Then, simply click the download button to save your new, perfectly proportioned 16:9 image to your computer.

Best Practices for Perfect 16:9 Images
Knowing how to convert an image is one thing. Knowing how to do it well is what separates good content from great content. Here are some practical tips I've gathered over the years:
-
Start with the Highest Quality Source: Always begin with the largest, highest-resolution image you have. It's much easier to scale a large image down to 1920x1080 without losing quality than it is to scale a small image up (which results in a blurry, pixelated mess).
-
Mind Your Focal Point: When cropping, think about the "rule of thirds." Place the most important visual element—your face, the product, the bold text—slightly off-center. This creates a more dynamic and engaging thumbnail.
-
Choose the Right File Format:
- JPEG: Best for photographs and complex images with lots of colors. It offers a good balance between quality and file size.
- PNG: Best for images with text, logos, or sharp lines. It preserves detail perfectly but can result in larger file sizes. For YouTube thumbnails with text overlay, PNG is often my go-to.
-
Optimize for Web (Compress): After resizing, a tool like TinyPNG or the compression features within ResizeOn can further reduce the file size. This is how you truly resize image without losing quality while keeping your site and YouTube Studio loading fast.
-
Follow the YouTube Image Size Guide: As of 2026, the ideal YouTube thumbnail size is still 1280x720 pixels (with a minimum width of 640 pixels). This ensures your image looks sharp on both desktop monitors and mobile devices.
Common Mistakes to Avoid
Even experienced designers can slip up. Here are the pitfalls I see most often:
- Stretching the Image: This is the cardinal sin. Never, ever manually drag the corners of an image to force it into a 16:9 box. It distorts faces and text, making your content look unprofessional. Always use a cropping tool.
- Ignoring the Mobile Preview: Over 70% of YouTube views come from mobile. A thumbnail that looks great on a 27-inch monitor might be illegible on a small phone screen. After converting, preview your image at a smaller size. Is the text still readable? Is the subject still identifiable?
- Uploading Oversized Files: Uploading a 5MB file when a 200KB file will do is wasteful. It slows down the upload process and can frustrate viewers with slower internet connections. Always check your file size after resizing.
- Forgetting About Text Safety Zones: YouTube places timestamps and other UI elements over the bottom right corner of your thumbnail. I've seen too many creators put crucial text there, only to have it covered up. Keep all important elements in the center or top half of your 16:9 frame.
Comparison with Other Tools
You might be wondering, "Why not just use Photoshop or another popular online editor?" Here's my take based on hands-on experience:
- Adobe Photoshop: Is it powerful? Absolutely. It's the industry standard for a reason. But for the simple task of converting an image to a 16:9 ratio, it's overkill. You need to know how to use the crop tool, manually enter the aspect ratio, and then use "Save for Web" to optimize it. It's time-consuming, especially if you're not a regular user, and it requires a paid subscription.
- Canva: Canva is fantastic for designing thumbnails from scratch. If you're building a graphic, starting with a 16:9 custom size is easy. However, if you have an existing photo you love, uploading it to Canva just to crop it adds extra steps. It's a design platform first, a quick converter second.
- Basic Online Converters: There are hundreds of free tools out there. However, I've tested many that add watermarks, have spammy ads, or significantly degrade image quality. The Change Image Aspect Ratio to 16:9 tool stands out because it's clean, focused, and respects the quality of your source image without trying to upsell you on a "pro" version every five seconds.
Frequently Asked Questions
1. What are the exact 16:9 dimensions for a YouTube thumbnail?
The recommended and best practice size is 1280 x 720 pixels. This ensures high quality across all devices. The minimum width is 640 pixels.
2. Will converting my image to 16:9 reduce its quality?
Not if you do it correctly. If you start with a high-resolution image and use a tool that crops and scales intelligently (rather than stretching), you will resize image without losing quality. The final image will be optimized for its intended display size.
3. Can I convert a vertical (portrait) photo to 16:9?
Yes, but you will have to crop the top and bottom. The tool will show you a crop window—you'll need to decide which part of the vertical photo is most important to keep in the wider frame.
4. What's the difference between 16:9 and 4:3?
16:9 is the widescreen standard for modern TVs, monitors, and YouTube. 4:3 is an older, more square "fullscreen" ratio used by old TVs and computer monitors. Using 4:3 on YouTube will result in black bars on the sides.
5. Is it possible to add a background blur instead of cropping?
Yes, some advanced tools allow you to place your image in the center and fill the 16:9 sides with a blurred version of the image. However, for YouTube thumbnails, cropping is almost always the better choice for a clean, professional look.
6. How do I make text fit perfectly on a 16:9 thumbnail?
The key is to design with the dimensions in mind. Use the 1280x720 canvas size. Keep your text large, bold, and centered to ensure it's visible on mobile devices and isn't cropped out.
7. I need to convert dozens of images. Is there a batch process?
While the primary tool is for single images, its speed makes quick work of batches. For bulk automated processing, you might look at desktop software, but for most creators, doing them one by one with this tool is perfectly efficient.
8. What file format is best for 16:9 YouTube thumbnails?
I recommend using JPG for photographs to keep file sizes low, and PNG for images with text, logos, or sharp graphics to preserve detail.
Conclusion
Mastering how to convert image to 16:9 aspect ratio for YouTube is a fundamental skill for anyone serious about content creation in 2026. It ensures your visuals look sharp, professional, and exactly as you intended, whether on a massive desktop screen or a tiny smartphone display. By following the steps and best practices outlined in this guide, you can avoid the common pitfalls that hurt viewer engagement and brand credibility.
Remember, you don't need complex software to achieve perfect results. For a quick, free, and reliable solution, I highly recommend the Change Image Aspect Ratio to 16:9 tool. It handles the heavy lifting, allowing you to focus on what really matters: creating great content. Try it with your next thumbnail and see the difference a perfectly proportioned image can make.